How to Improve Night Vision in Your Security Camera Setup
Introduction: Are Your Cameras Seeing Clearly After Dark?
It might surprise you that nearly 60% of all home burglaries occur at night. For businesses and homeowners alike, nighttime surveillance is often the most critical aspect of a security strategy. But while many cameras promise "night vision," not all perform well when the lights go out.
Blurry images, overexposed headlights, and limited visibility are common issues—especially with older or poorly installed systems. Fortunately, there are proven ways to improve night vision in your security camera setup, and doing so can make the difference between capturing useful footage or none at all.
This guide will walk you through key concepts, from understanding how night vision works to choosing the right cameras, optimizing lighting, and overcoming environmental challenges. If you rely on your surveillance system after sunset, these tips are essential.
What Is Night Vision in Security Cameras?
Night vision in security cameras refers to the ability to record video in low-light or complete darkness. This is typically accomplished using infrared (IR) technology, which emits invisible IR light that reflects off objects and allows the camera to capture images beyond the range of human sight.
Types of Night Vision:
-
Infrared (IR) Night Vision: Most common; uses IR LEDs to illuminate scenes
-
Starlight Night Vision: Uses high-sensitivity image sensors to amplify ambient light
-
Thermal Imaging: Detects heat signatures rather than light (used in specialized systems)
Night vision is especially important in the surveillance industry, where 24/7 visibility is a requirement. It helps secure perimeters, catch intruders, monitor driveways, and ensure that incidents are recorded clearly—even in total darkness.
Benefits & Use Cases
Enhanced Security and Crime Prevention
Cameras with strong night vision deter criminal activity and offer clear footage for law enforcement.
Use Case: A business installs upgraded IR cameras around its parking lot, resulting in higher resolution images of license plates and faces after dark.
24/7 Monitoring for Homes and Businesses
Night vision ensures your property is protected even when you're asleep or away.
Use Case: A homeowner uses smart night vision-enabled cameras to receive mobile alerts for motion detected near windows at night.
Improved Evidence in Low-Light Conditions
Clear nighttime footage is essential for identifying suspects or verifying incidents.
Use Case: A security system captures a break-in at 2 a.m., and the footage clearly shows the intruder’s features and direction of entry.
Challenges & Considerations
Inadequate IR Range
Basic cameras may only illuminate objects 15–30 feet away, leaving larger areas in darkness.
Solution: Choose cameras with longer IR range (50–100 feet or more) for larger properties.
Glare and Overexposure
Shiny surfaces, reflective signs, or nearby light sources can cause overexposure, distorting the image.
Solution: Adjust camera angles and avoid pointing directly at reflective surfaces or lights.
Inconsistent Lighting Conditions
IR cameras can struggle when transitioning between bright and dark zones.
Solution: Use cameras with Wide Dynamic Range (WDR) or Smart IR to automatically adjust brightness and contrast.
Weather and Environmental Interference
Rain, fog, and dust can reduce image clarity and scatter IR light.
Solution: Choose weatherproof cameras with anti-reflection coatings and place them under eaves or covers.
How to Improve Night Vision in Your Camera Setup
Step 1: Upgrade to High-Quality IR Cameras
Not all IR cameras are equal. Look for models with:
-
850nm or 940nm IR LEDs
-
Minimum of 100 feet night vision range
-
Adjustable IR intensity
-
Smart IR or WDR for light balancing
-
IR cut filter for daytime clarity
Tip: Cameras with EXIR or array-based LEDs offer more even lighting than traditional ring-style LEDs.
Step 2: Optimize Camera Placement
-
Install cameras 8–10 feet high for optimal IR coverage
-
Avoid aiming cameras at windows, headlights, or shiny objects
-
Keep cameras shaded from ambient lighting that may interfere with IR performance
-
Face cameras toward open areas, not enclosed, reflective corners
Step 3: Supplement with External IR Illuminators
If your camera’s built-in IR isn’t powerful enough, use separate IR illuminators to light larger zones.
-
Choose wavelength (850nm for visible red glow; 940nm for complete stealth)
-
Mount illuminators alongside or above the camera for even lighting
Use Case: A warehouse installs four IR floodlights to cover an entire loading bay, eliminating dark spots between camera angles.
Step 4: Add Ambient or Motion-Activated Lighting
Low-level lighting (LED or motion-activated floodlights) can help cameras perform better by providing a minimal light source.
-
Use warm LED lights that don’t trigger false alerts
-
Choose lighting with narrow beam focus to avoid glare
-
Sync motion lights with camera alerts to deter intruders
Step 5: Clean and Maintain Camera Lenses
Dust, cobwebs, or water droplets can degrade night vision performance.
-
Wipe lenses monthly with microfiber cloth
-
Check IR LEDs and housing for debris
-
Use weatherproof housings in harsh environments
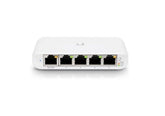
Step 6: Use PoE for Stable Power and Data
Power over Ethernet (PoE) ensures your cameras have stable power and connectivity, which is crucial for night vision performance.
-
Reduces voltage drops over long distances
-
Simplifies installation with fewer cables
Explore our collection of networking and PoE solutions to ensure optimal camera performance.
Step 7: Adjust Camera Settings in the Software
Most modern systems let you tweak night mode via the app or NVR:
-
Enable smart IR to reduce overexposure
-
Set gain levels and exposure time manually
-
Activate motion-based recording to conserve storage
-
Review image quality in different lighting conditions
FAQs
How far can night vision cameras see?
It depends on the model. Entry-level cameras offer 15–30 feet, while high-end models can reach 100–200 feet or more with powerful IR LEDs.
Why does my night vision look blurry or washed out?
This is often caused by overexposure, dirty lenses, or poor placement. Use smart IR, clean your lens, and adjust your viewing angle.
Can I use outdoor night vision cameras indoors?
Yes, but indoor environments don’t usually require high IR power. Avoid glare from nearby surfaces, and disable IR if natural light is sufficient.
Conclusion: See Clearly, Secure Confidently
A reliable security camera setup doesn’t stop working when the sun goes down—it adapts. With the right combination of camera technology, lighting enhancements, and strategic placement, you can significantly improve your system’s performance in low-light or no-light environments.
Clear night vision can make the difference between a missed event and a detailed recording that protects your property and provides peace of mind.
Looking to upgrade your night vision security?
Explore our full line of night vision-ready cameras, networking equipment, and AV solutions at SportsGeekUSA.


