The Ultimate Guide to Setting Up a Home Security Camera System
Introduction: Is Your Home Surveillance Ready?
According to the FBI, a burglary occurs every 26 seconds in the U.S., with homes being a primary target. As smart technology becomes more accessible, more homeowners are investing in security systems that not only deter crime but also offer remote monitoring, real-time alerts, and 24/7 peace of mind.
Whether you're looking to protect your family, deter porch pirates, or monitor your property while traveling, setting up a home security camera system is one of the smartest steps you can take. But with so many options—wired vs. wireless, indoor vs. outdoor, cloud vs. local storage—how do you build the right system for your space?
This guide walks you through everything you need to know, from selecting cameras and choosing the right locations to installation, storage options, and remote access. Let’s secure your home the smart way.
What Is a Home Security Camera System?
A home security camera system consists of one or more video surveillance cameras strategically installed around your property to monitor activity, deter intruders, and record footage for playback or evidence. Most systems include:
-
Cameras (wired or wireless)
-
Recording device (NVR/DVR or cloud service)
-
Mobile app or viewing software
-
Connectivity (Wi-Fi or Ethernet)
-
Storage (local or cloud)
Today’s systems often include AI motion detection, facial recognition, two-way audio, and infrared night vision, offering far more than just video recording.
These systems can be customized to fit small apartments, multi-story homes, or properties with expansive outdoor areas, providing visual oversight, real-time alerts, and incident verification—from anywhere.
Benefits and Use Cases of Home Security Camera Systems
1. Crime Prevention and Deterrence
Visible cameras are one of the most effective deterrents to burglars. Criminals are far less likely to target homes with visible surveillance systems.
Use Case: A homeowner installs outdoor bullet cameras on all entrances. Burglary attempts drop, and delivery thefts are eliminated.
2. Real-Time Monitoring from Anywhere
With mobile apps and smart integrations, you can monitor your property from your phone or tablet in real time.
Use Case: A frequent traveler uses remote access to check the backyard while abroad, using two-way audio to speak to a delivery driver.
3. Incident Recording for Insurance or Legal Use
Recorded footage helps in proving damage or theft during insurance claims or criminal investigations.
Use Case: A security camera captures a package theft, providing police with evidence that leads to an arrest.
4. Safety for Kids and Pets
Indoor cameras help monitor kids after school or keep an eye on pets while you’re away.
Use Case: A family installs an indoor camera in the living room to check in on their dog and babysitter via a smartphone app.
Looking for high-performance, easy-to-install home surveillance cameras? SportsGeekUSA offers top-rated indoor and outdoor solutions.
Challenges and Considerations
Wired vs. Wireless Systems
-
Wired systems offer stability and higher video quality but require more complex installation.
-
Wireless systems are easier to set up and relocate but may suffer from signal interference or battery dependence.
Solution: Choose based on your home layout, technical comfort level, and budget. Hybrid systems can offer the best of both worlds.
Storage Limitations
Local DVRs or NVRs require physical space and can be lost in fires or theft. Cloud storage can get expensive over time.
Solution: Many users combine both for redundancy—local storage for high-resolution files and cloud for remote access.
Network Reliability
Wireless cameras depend heavily on a stable network. Weak Wi-Fi can result in dropped footage or poor image quality.
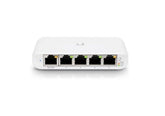
Solution: Upgrade your router, add mesh Wi-Fi extenders, or consider Ethernet-connected PoE (Power over Ethernet) cameras for better performance. Explore networking solutions to support your system.
Privacy Concerns
Cameras in sensitive areas or improper access permissions can lead to privacy breaches.
Solution: Avoid placing cameras in private spaces like bathrooms or bedrooms, and always password-protect your system with strong encryption and two-factor authentication.
How to Set Up a Home Security Camera System: Step-by-Step
Step 1: Choose the Right Type of Cameras
-
Indoor vs. Outdoor: Outdoor models should be weather-resistant with IP65+ ratings.
-
Bullet Cameras: Ideal for long-distance viewing and outdoor spaces.
-
Dome Cameras: Blend in better indoors and offer wide-angle coverage.
-
PTZ Cameras: Pan-tilt-zoom models offer 360° control for large properties.
-
Smart Cameras: Support features like voice control, motion zones, and smart alerts.
Tip: Match camera specs to your specific needs (e.g., night vision range, frame rate, zoom level).
Step 2: Decide on Recording and Storage Options
-
NVR (Network Video Recorder): Works with IP cameras and offers high-resolution recording.
-
DVR (Digital Video Recorder): Used with analog cameras, lower cost but limited resolution.
-
Cloud Storage: Accessible from anywhere but may require subscriptions.
Hybrid Systems: Many smart camera kits allow local SD card storage and cloud backup.
Step 3: Map Out Coverage Zones
Plan camera placement based on:
-
Main entrances and exits
-
Driveways and garages
-
Windows not visible from the street
-
Backyard, patio, or side gates
-
Indoor common areas (living room, hallway)
Use a site survey or sketch of your home to determine blind spots and overlaps.
Step 4: Install Cameras Strategically
Installation Tips:
-
Mount cameras 8–10 feet off the ground
-
Use wide-angle lenses for small rooms
-
Tilt cameras slightly downward to reduce glare
-
Use junction boxes or conduit for outdoor cable protection
Wired Cameras: Run cables through walls or ceilings and connect to the recorder or router.
Wireless Cameras: Mount near power sources and strong Wi-Fi signal. Use solar-powered options for added flexibility.
Step 5: Connect to Network and Power
-
For wired IP cameras: Use PoE injectors or switches for a single-cable solution (power + data).
-
For wireless cameras: Connect to your home Wi-Fi via the app during setup.
Ensure all devices are powered, connected, and visible in the mobile or desktop management app.
Step 6: Configure Software and Settings
-
Name each camera for easy monitoring
-
Set up motion detection zones to reduce false alerts
-
Enable event-based recording to save storage
-
Adjust alert thresholds to notify you of unusual activity
-
Test night vision, two-way audio, and app notifications
Step 7: Secure Your System
-
Change default usernames and passwords
-
Enable two-factor authentication
-
Keep firmware updated
-
Use encrypted connections and disable remote access if unnecessary
FAQs
How many cameras do I need for a typical home?
Most homes use 4–8 cameras, covering entrances, driveways, main hallways, and shared living spaces.
Can I install a home security system myself?
Yes. Many modern systems are DIY-friendly and include mobile setup guides. Wired systems may require drilling or routing cables but are still manageable with basic tools.
What internet speed is needed for remote monitoring?
A minimum of 2–5 Mbps upload speed per camera is recommended for smooth remote viewing and cloud uploads.
Conclusion: Secure Your Home with Confidence
A properly installed home security camera system does more than just monitor—it provides peace of mind, deters crime, and lets you stay connected to what matters most. By selecting the right cameras, optimizing placement, and securing your network, you create a defense that protects your family, property, and daily peace of mind.
Whether you're a first-time buyer or upgrading your current setup, understanding your options and following best practices can make the difference between a vulnerable home and a truly secure one.
Ready to protect what matters?
Shop premium home security cameras, networking gear, and AV systems at SportsGeekUSA today.


